Installing concrete fence posts demands precision and patience. The quality of your installation determines whether you'll enjoy decades of reliable service or face costly repairs within months. This guide covers the full process, the four mistakes that cause most failures, and when to call a professional concrete supplier for your post mix.
What Preparation Do You Need Before Installing Concrete Fence Posts?
Check your boundary: Before digging, verify boundary lines by consulting your property deeds or checking with the Land Registry. Installing posts on a neighbour's land creates legal complications that far exceed any project savings.
Gather tools and materials: You'll need a spade or post-hole digger, spirit level, string line, tape measure, rubber mallet, wooden props for bracing, and safety equipment. For materials: concrete fence posts, concrete mix or postcrete, gravel for drainage, and water.
Plan your layout: Standard fence panels measure 1.83m (6ft), so space posts accordingly. Use a string line between corner posts to ensure alignment, and double-check measurements before digging.
How Do You Install Concrete Fence Posts Step by Step?
Step 1 — Dig the holes: For standard 1.8m high fencing with 2.4m posts, dig holes 60cm deep. The rule: one-third of total post length below ground. Make holes three times the post width to allow adequate concrete coverage. Always call Dig Safe before excavating to locate underground utilities.
Step 2 — Prepare the base: Add 10–15cm of gravel to each hole for drainage. This prevents water accumulation that causes frost heave in winter. Compact the gravel firmly.
Step 3 — Mix and pour the concrete: For the best results, use a proper concrete mix rather than basic postcrete. Ready-mix concrete or volumetric concrete delivers consistent C20 grade material — ideal for domestic fence post applications. For volumes, use our concrete calculator before ordering. Quick-set postcrete is convenient for 1–2 posts; for a full fence run, professional delivery is more economical and consistent.
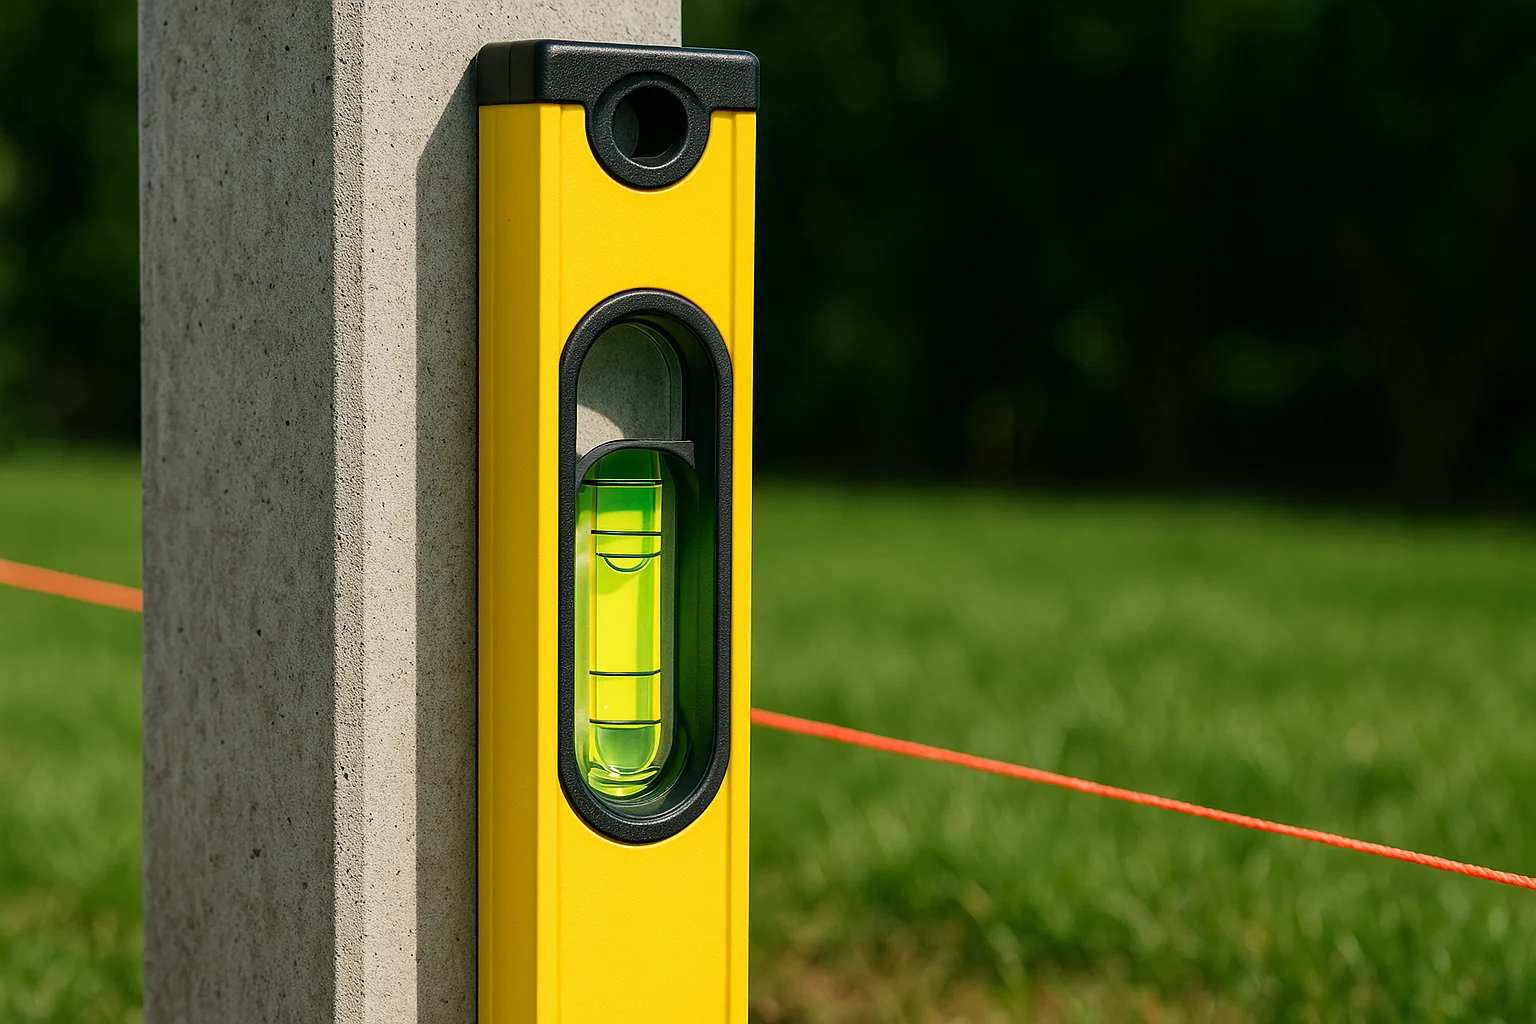
Step 4 — Set the posts: Position the post centrally in the hole, then pour concrete around it whilst checking plumb on two adjacent faces with a spirit level. Install temporary wooden braces to hold position whilst the concrete sets.
Step 5 — Check alignment throughout: Stretch a string line between the first and last posts to ensure all intermediate posts align and maintain consistent height. Small adjustments during installation prevent major problems later.
Step 6 — Cure before loading: Allow 48–72 hours minimum before installing fence panels. Rushing this stage compromises the entire installation's long-term stability.
What Are the Most Common Concrete Fence Post Installation Mistakes?
Mistake 1 — Holes too shallow: Insufficient depth creates weak installations that lean or fail in storms. Always follow the one-third rule regardless of soil conditions. Sandy soils may need slightly deeper holes.
Mistake 2 — Weak or poorly mixed concrete: Skimping on concrete quality or volume creates crumbling post bases that fail prematurely. Proper coverage around the full depth of the post is essential. For consistent quality across a full fence run, our domestic concrete service ensures every post is set in the same specification material.
Mistake 3 — Not checking level continuously: Failing to check vertical alignment throughout creates visibly crooked fences. Check plumb frequently during pouring and during the first hour of setting.
Mistake 4 — Rushing curing: Installing panels before concrete has cured weakens the bond and may disturb post positioning. Cold weather requires longer curing; in winter, allow at least 96 hours and protect from frost.
Frequently Asked Questions About Concrete Fence Post Installation
Can I install concrete fence posts in winter?
Yes, but cold weather extends curing times significantly. Avoid installation when temperatures drop below 5°C, and protect fresh concrete from freezing for at least 48 hours. Our blog on pouring concrete in cold weather covers the precautions needed.
How long before I can attach fence panels?
Wait a minimum of 48–72 hours for standard concrete mixes. Quick-set postcrete may allow earlier installation, but longer curing always provides better results.
What if my posts aren't aligned after installation?
Minor adjustments are possible within the first few hours whilst concrete remains workable. For major alignment issues, remove and reinstall affected posts — don't accept poor positioning that compromises the entire fence.
Do I need planning permission for fence installation?
Most residential fencing under 2m doesn't require planning permission. Check with your local council, particularly if adjacent to a highway or in a conservation area.